
| 일 | 월 | 화 | 수 | 목 | 금 | 토 |
|---|---|---|---|---|---|---|
| 1 | ||||||
| 2 | 3 | 4 | 5 | 6 | 7 | 8 |
| 9 | 10 | 11 | 12 | 13 | 14 | 15 |
| 16 | 17 | 18 | 19 | 20 | 21 | 22 |
| 23 | 24 | 25 | 26 | 27 | 28 | 29 |
| 30 |
- 비지니스로직
- 리액트 네이티브 캐러셀
- 리액트 네이티브 네비게이션
- 프론트엔드 개발블로그
- react
- 네이티브 css
- 리액트 무한스크롤
- 리액트 네이티브
- 전역상태관리
- FlatList
- 리액트
- JavaScript
- 리액트쿼리
- 자바스크립트
- 플랫리스트
- 리액트 사진크기
- 리액트네이티브 검색
- HTML
- 무한스크롤
- 리액트쿼리 무한스크롤
- react native navigation
- React Native
- react native routes
- 리액트 네이티브 map
- expo-location
- 리액트네이티브 라우트
- React-qurey
- 부트캠프항해
- react-native
- ui로직
- Today
- Total
솧디의 개발로그
리액트 네이티브 CSS하기 완전정복! 2탄 FlatList활용하기!(carousel) 본문
리액트 네이티브 CSS하기 완전정복! 2탄 FlatList활용하기!(carousel)
솧디_code 2023. 2. 21. 11:05
이번엔 네이티브에서 가장
활용을 잘할 수 있는 CSS? 아이템이다!
바로
FlatList
기존에 데이터를 map을 돌려 사용했다면
FlatList는 renderItem을 이용해 CSS처리하면서
같이 사용할수있는 아이템이다!
map처리하는 로직을 줄일수있다!!

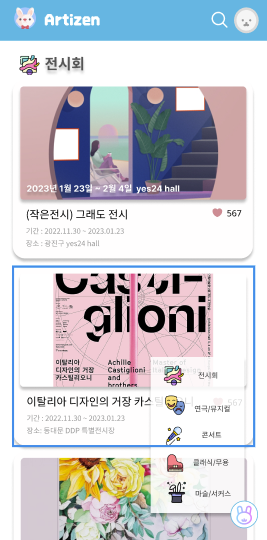
위 의 캐러셀이나 리스트를 뿌려줄 때 사용 할수있다!
캐러셀을 hook으로 만들어 컴포넌트에서 재활용 할 수있게 하였다.
import React from "react";
import { Dimensions, Image } from "react-native";
import styled from "styled-components/native";

export default function Page({ item, style }) {
  return (
    <PageItem color={item.color} style={[style]}>
      {/* <PageNum>{item.num}</PageNum> */}
      <Image
        source={{
          // uri: item?.posterUrl,
          uri: item?.posterUrl,
        }}
        style={{
          resizeMode: "contain",
          height: Dimensions.get("window").height / 2,
          width: "100%",
        }}
      ></Image>
    </PageItem>
  );
}
page의 item은 props로 받아 사용하고
이 page의 props받은 내용이 캐러셀 요소이다.
renderItem이 될 예정!
import React, { useState } from "react";
import { FlatList } from "react-native";
import styled from "styled-components/native";
import Page from "./Page";

const Carousel = ({ pages, pageWidth, gap, offset }) => {
  const [page, setPage] = useState(0);
  // props 정보를 reder 하는 함수
  function renderItem({ item }) {
    return (
      <Page
        item={item}
        style={{ width: pageWidth, marginHorizontal: gap / 2 }}
      />
    );
  }

  const onScroll = (e) => {
    const newPage = Math.round(
      e.nativeEvent.contentOffset.x / (pageWidth + gap)
    );
    setPage(newPage);
  };

  return (
    <Container>
      <FlatList
        automaticallyAdjustContentInsets={false}
        contentContainerStyle={{
          //   paddingHorizontal: offset + gap / 2,
          paddingHorizontal: 0,
        }}
        data={pages}
        decelerationRate="fast"
        horizontal
        keyExtractor={(item) => `page__${item.url}`}
        onScroll={onScroll}
        pagingEnabled
        renderItem={renderItem}
        snapToInterval={pageWidth + gap}
        snapToAlignment="start"
        showsHorizontalScrollIndicator={false}
      />
      <IndicatorWrapper>
        {Array.from({ length: pages.length }, (_, i) => i).map((i) => (
          <Indicator key={`indicator_${i}`} focused={i === page} />
        ))}
      </IndicatorWrapper>
    </Container>
  );
};

export default Carousel;
캐러셀에서 데이터를 설정하고
그 안의 데이터를 렌더아이템으로 활용하여
각각의 요소들을 CSS처리 할 수 있다.
renderItem을 따로 만들어줄수도있고
컴포넌트를 만들어 렌더아이템에 적용하여
사용할수있다.
FlatList 안에서도 제공해주는 여러가지 기능들이있다.
▶ 리액트 네이티브 공식문서 참고
https://reactnative.dev/docs/flatlist
FlatList · React Native
A performant interface for rendering basic, flat lists, supporting the most handy features:
reactnative.dev
캐러셀은 FlatList활용 응용편이라면
그냥 map쓰듯이 데이터를 활용할수있다.
import {
  StyleSheet,
  View,
  Text,
  Button,
  Image,
  TextInput,
  TouchableOpacity,
  ImageBackground,
  Dimensions,
  FlatList,
} from "react-native";
import styled, { css } from "styled-components/native";
import Theme from "../../../Theme/Theme";
import ScrollViewLayout from "../../Layout/ScrollViewLayout";
import { SafeAreaView } from "react-native-safe-area-context";
import Layout from "../../Layout/Layout";
import PrMyPageWrapper from "./PrMyPageWrapper";
const PrMyLike = ({ mylikeDatas, loadMore, navigation }) => {
  const renderItem = ({ item }) => {
    return (
      <TouchableOpacity
        style={styles.StContentWrapper}
        activeOpacity={0.9}
        onPress={() =>
          navigation.navigate("MainRoutes", {
            screen: "ContentDetail",
            params: { id: item.id, category: "" },
          })
        }
      >
        <View>
          <View style={styles.StImgWrapper}>
            {item.posterUrl ? (
              <Image source={{ uri: item.posterUrl }} style={styles.StImg} />
            ) : (
              <Image
                source={require("../../../assets/login/logo_v1_3.png")}
                style={styles.StEmptyImg}
                resizeMode="contain"
              />
            )}
          </View>
          <View style={styles.StTextWrapper}>
            <Text style={styles.StNameText}>{item.cultureName}</Text>
            <Text style={styles.StText}>기간 : {item.date}</Text>
            <Text style={styles.StText}>장소 : {item.place}</Text>
          </View>
        </View>
      </TouchableOpacity>
    );
  };
  return (
    <PrMyPageWrapper
      title="좋아요"
      icon={require("../../../assets/mypage/Like.png")}
    >
      {mylikeDatas && mylikeDatas.length > 0 ? (
        <FlatList
          // ListHeaderComponent={<></>}
          renderItem={renderItem}
          data={mylikeDatas}
          keyExtractor={(item) => item?.id}
          onEndReached={loadMore}
          onEndReachedThreshold={0.5}
          // contentContainerStyle={{}}
          // ListFooterComponent={}
        />
      ) : (
        <Layout>
          <Text>좋아요한 게시물이 없습니다.</Text>
        </Layout>
      )}
    </PrMyPageWrapper>
  );
};

export default PrMyLike;
데이터를 프롭스받아 요소들 하나하나를 item으로 설정되어있다.
그래서 renderItem에서 활용할때 {item.title} 와 같이 사용해주면 된다.
그렇다고 네이티브에서 map이 안되는건아니다!
다만 FlatList를 활용하면
무한 스크롤 활용하기에도 편리하고
map처리없이 바로 css작업할수있어 편리하다.
그럼이만 총총
'React 리액트 > React-Native 리액트네이티브' 카테고리의 다른 글
| React-Native에서 추천 검색어 기능 구현하기! (0) | 2023.02.24 |
|---|---|
| React-Native에서 검색기능 구현하기! (전역상태관리 없이 props로만 ) (0) | 2023.02.23 |
| 리액트 네이티브 CSS하기 완전정복! 1탄 scrollview 활용하기! (0) | 2023.01.15 |
| [React-Native] expo-location통해 hook 만들기! (1) | 2023.01.14 |
| React-native로 앱개발하기- < mac에 react-native 설치하기 > (0) | 2023.01.06 |


